Step 1 - Get it back into a cube
Honestly I can't tell you how to turn Square-1 into a cube. However I can provide some loose strategies, guidlines, and a little insight on getting this accomplished. Before attempting to go on, please please please PLEASE get to know your Square-1. Play around with it for a while so that you have a STRONG grasp on understanding how it moves and the effects of your moves. I also deeply encourage you to figure out how to turn Square-1 back into a cube on your own without using the steps I have written out below. Your own, personal, made-up solution will no-doubtly be the least confusing to you.
And with that said...
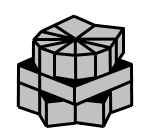
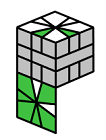
It's a heck of a lot easier to group all 8 edges on one side rather than directly putting Square-1 into a cube.
 |
 |
|
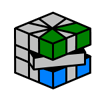
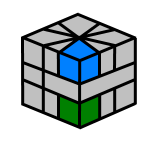
| This is easy to do. | This is not. |
The reason for doing this is because there's a very short set of moves to turn this into a cube.
From this position, I can give you a very short set of moves that will turn it into a cube.
Clump as many edges together as you can. Join groups of edges until you have all 8 of them stuck together. As you do this for several minutes, you'll begin to notice some behaviors and traits of certain arrangements of edges...
A
When you have two edges next to each other, it is the same width as a corner. This is very good and easy to maneuver. |
B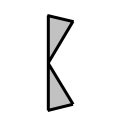
Two edges almost directly across from each other. If you have 2 of these you can put them together and make 2 A's. If not, you can wait for the remaining 6 edges to clump and join them up at the end. |
C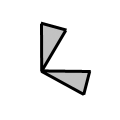
When 2 single edges are separated by 60 degrees, it gets cumbersome. Split these up as soon as you can and try to get them into one of the two previous arrangements as soon as you can. Note: Two C's adjacent next to each other create an A and a B. Keep that in mind when you're trying to get rid of the C's. |
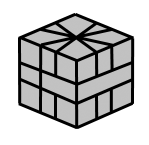
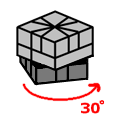
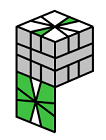
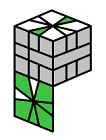
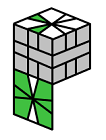
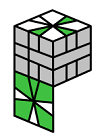
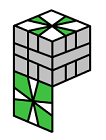
Once you've gotten all 8 edges together it should look something like this...

So now that you hopefully have something like that, follow these moves to quickly make this weird conglomerate into a cube...
Note: the state of the middle row is not important, as long as the
dividing crease is always lined up with the way you want to turn Square-1.
 |
 |
 |
 |
 |
 |
 |
 |
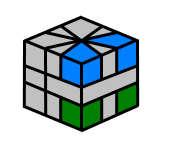
Step 2 - Get top and bottom corners on the correct side
This portion of the solution will only deal with making these the same color...
Same goes for the bottom, but we won't refer to the bottom anymore in this step, because if you get the 4 corner stickers on the top correct, the 4 corner stickers on the bottom will end up in the correct place anyway.
The top and the bottom are typically green and white on a standard Square-1. I will typically refer to the face that should be white as the top and the face that should be green as the bottom.
Here are two moves to switch corners from the top and the bottom...
 |
To switch the two corners on the top on the right with the two corners on the bottom on the right, do this... |
 |
 |
 |
 |
As a reminder, it does not matter what state the middle row is in, that's just a minor nitpick at the end of the solution. Just make sure that the crease on the middle row lines up with the way you want to turn Square-1.
 |
To switch the two corners on the right in the front do this... |
 |
|
 |
 |
 |
 |
Twist the top and bottom to align corners however you wish and use these 2 moves over and over until all the top corners are white and the bottom are all green. Don't worry about the skinny edges. That comes in the next step.
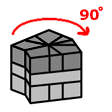
Step 3 - Get rest of top and bottom pieces on the correct side
In this step, we are concerned only about getting the white edges on the top and the green edges on the bottom, don't worry about where the go specifically on the top or bottom, just get them on the correct layer.
Compare the setup of the edges to the diagrams shown below (the diagrams after sequence A & B). If you need to, rotate the top and bottom layers to make them match.
I will also refer to the following 2 sequences of moves in this step:
Sequence A
|
|
 |
 |
 |
Sequence B
 |
 |
 |
 |
 |
 |
|
The Diagrams
|
 [Sequence A]
[Sequence B]
[Sequence A]
[Sequence B] 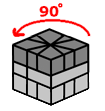 [Sequence B]
[Sequence A]
[Sequence B]
[Sequence A]
|
|
[Sequence A] |
|
[Sequence B]
 [Sequence B]
 [Sequence A] |
|
[Sequence B]
[Sequence B] [Sequence A] |
|
[Sequence B] [Sequence A] |
|
[Sequence A]
 [Sequence B]
 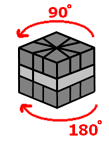 [Sequence B]
[Sequence A]
[Sequence B]
[Sequence A]
|
|
[Sequence A]
 [Sequence A]
|
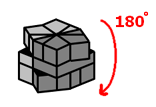
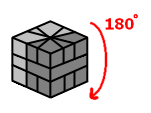
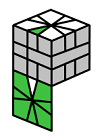
Step 4 - Put corners in correct positions
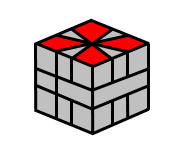
Now you need to position the corners so that the line up relative to each other ignoring the edges. Should look something like this when you're done...
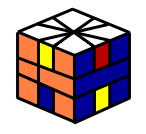
Like a bunch of H's on each side.
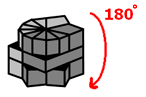
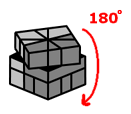
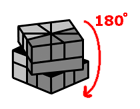
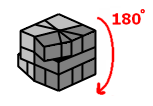
This move will swap the two corners on top in the front AND swap the two corners on the bottom in the front:
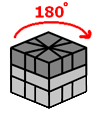
- Rotate the cube 180 degrees so that you are now looking at the back
- Do Sequence B from the previous step
- Rotate the cube 180 degrees again.
Hah! The answer was right under your nose for the past week!
Now if you just want to switch two corners on the top without messing up the bottom, then...
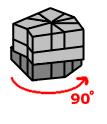
- Position the two corners that need to be switched so that they're on the top-front-right and top-back-right positions.
- Do Sequence B.
- Turn the top clockwise 90 degrees
- Do B again!
- Turn the top until it's back to normal
And remember, if it's the bottom you need to mess with, there's nothing wrong with rotating the cube so top is now bottom and vice-versa.
Step 5 - Everything Else
Warning: in this final step for the Square-1 solution, I will torture you by somewhat making you logically reason-out the algorithms. You'll thank me down the road...or something.
Now it's time to solve as many edge pieces as possible. Luckily all the moves you will see in this step were ripped from previous steps that you have already done.
Remember our old friend Sequence B from step 3?
Sequence B
|
|
|
|
|
|
|
We used it in step 4 to switch corners around. However, not only did it switch corners around, but it also swithced a few adjacent edges around too. Namely, it swapped the two corner and edge pairs that were bisected by the opening move.
Optional: For fun, go ahead and do the sequence twice just to see for yourself. Watch just the top row. Note where your pieces are right now. Then do the move, and watch where they all go with particular emphasis to the edges. Now do the sequence again to put everything back the way it was. Wasn't that nifty? No? Too bad.
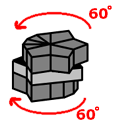
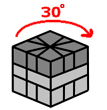
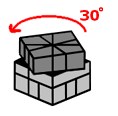
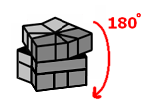
Here's how all this is useful to us. Turn the top 30 degrees in such a way that the middle-row slit is still lined up with a crease. Do Sequence B. The Square-1 will take on different shapes from the diagram throughout the move, but it will end up as a cube since all the turns are in increments of 90 degrees. When you do this, the SAME TWO CORNERS on the top were switched. However, different edges were switched.
"AHA!", you exclaim.
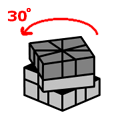
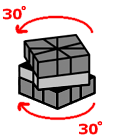
Do sequence B. Then turn the top 30 degrees. Do sequence B again. Each time two different pairs of overlapping edges were switched but the same two corners were switched on that row, thus cancelling the damage out. What do you have now? A 3-edge shuffle algorithm. Pretty neat, huh?
Same theory applies to the bottom.
A Problem!
What if you end up with two edges that need to be switched? You can't solve that with a 3-edge shuffle. If you're lucky, then the both the top and bottom have two edges that need to be switched.
Time for more algorithm recycling! Let's look at Sequence A that was also from Step 3...
Sequence A
|
|
|
|
|
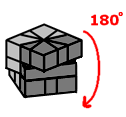
Look closely and you'll notice that this algorithm takes the 4 edges that are most closely aligned with the middle-row slit and shuffles them around. Namely, it rotates them about the cube in a 180 degree fashion. The edges that were on top are now on the bottom and vice versa. The edges that were in front are now in the back and vice versa. You can easily see that if you do this move again, it'll undo this and put everything back the way it was.
"AHA!", you exclaim again.
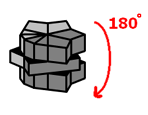
What if you were to do sequence A, then rotate the bottom by 180 degrees, and then do sequence A again? That would switch the position of the two bottom edges before they returned home to the top. It would also switch the two target locations of the top edges before they went home to the bottom. You now have a 2-edge shuffle that works on the top and bottom simultaneously.
Another Problem!
So now you may be asking what happens if you're left with two edges on the top of the cube that need to be switched but not on the bottom (or vice versa)?
This is a very unlucky case and is known as a parity-problem.
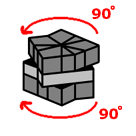
You're not going to like this solution. Hold the cube in any old way such that it simply is in the shape of a cube and the middle-layer slit is in front of you and the top is still on top...
- Turn the right half 180 degrees
- Turn the top 90 degrees clockwise
- Turn the bottom 90 degrees clockwise
- Turn the right half 180 degrees
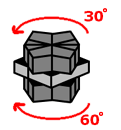
- Turn the top counter clockwise 30 degrees
- Turn the bottom counter clockwise 60 degrees
- Turn the right half 180 degrees
- Turn the bottom 60 degrees clockwise
- Turn the top 60 degrees counter clockwise
Now turn the right half 180 degrees and then undo all the moves you just did...
- Turn the top 60 degrees clockwise
- Turn the bottom 60 degrees counter clockwise
- Turn the right half 180 degrees
- Turn the bottom clockwise 60 degrees
- Turn the top clockwise 30 degrees
- Turn the right half 180 degrees
- Turn the bottom 90 degrees counter clockwise
- Turn the top 90 degrees counter clockwise
- Turn the right 180 degrees
Yes, it should look totally scrambled but the top and bottom should both still be squares. Now go back to Step 2. This time when you get to this step, this situation won't happen. I promise.
One last thing...
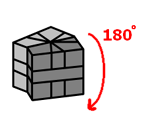
If the middle layer is somewhat discombobulated and un-square-like, turn the right half 180 degrees, then turn the top 180 degrees. Repeat 2 more times. POOF! Fixed.